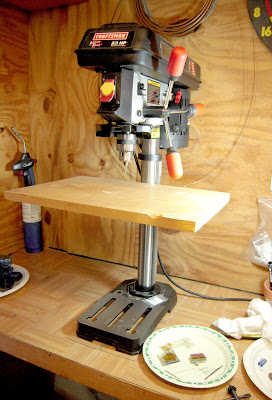
I always get a lot of questions about how I cut, drill and grind my glass, so this is a peek into my glass drilling process.
First, I have my handy dandy, affordable Sears drill press set up in my shed. I added the wooden shelf to the metal table that is already on the drill press to give myself a little more real estate to work.
If I'm drilling a large piece I usually put it under water in an old photography developing tray and it needs more support.
The drill bits I'm using are 2.1mm diamond twist drill bits from Rio Grande. These work the best of any I have tried.
I use a variety of shallow dishes full of water to drill my pieces. I have a piece of self stick floor tile under the glass piece (that's not stuck). You want something sort of soft there so the drill bit doesn't hit the container when it breaks through the back.
It's important to mark the spot you're going to drill with a Sharpie because the distortion of the water will make it difficult to line up the drill bit. Oh, and make sure you let the sharpie ink dry before you stick it in the water or I'm not joking, the ink spot will actually float away in the water!
I know my left hand is not showing in this photo, but under normal circumstances it would be there, carefully holding the piece of glass while the drill bit descends...but I was trying to take the photo with one hand and lower the bit with the other!
I start out gently touching the bit to the glass, just to make a divot and get it started. Then, I apply gentle pressure for a count of about 7, and then I lift the drill bit all the way out of the hole which cleans out all the gunk (holding it with my left hand so it doesn't move out of place).
Then, lower the bit again and repeat.
Go slowly when you think you're getting close to breaking through...too fast and you'll take a chunk out of the back.You'll know that you're getting close to breaking through after you do it a few times...the drilling just FEELS different.
And voila! a perfect little hole!


No comments:
Post a Comment